Full batch of eggnog in quart mason jars

Introduction:

This recipe takes about 30 minutes of active time.

Eggnog is one of my personal holiday traditions. Most recipes involve a lot of tedious mixing and egg separating. Using raw eggs also carries a risk of salmonella, which made my wife less supportive.

After extensive “testing” and experimentation with different recipes, here is my Safe and Easy Eggnog. This recipe uses whole eggs so you can use pasteurized eggs from a carton. I use a 6 quart stand mixer with the wire whisk attachment to mix everything in a single bowl. The recipe makes an easy half batch, but you might need to use a handheld mixer to get the eggs started if the whisk on your mixer doesn’t reach to the bottom of the bowl.  Unlike store bought eggnog, this mix will separate over time.

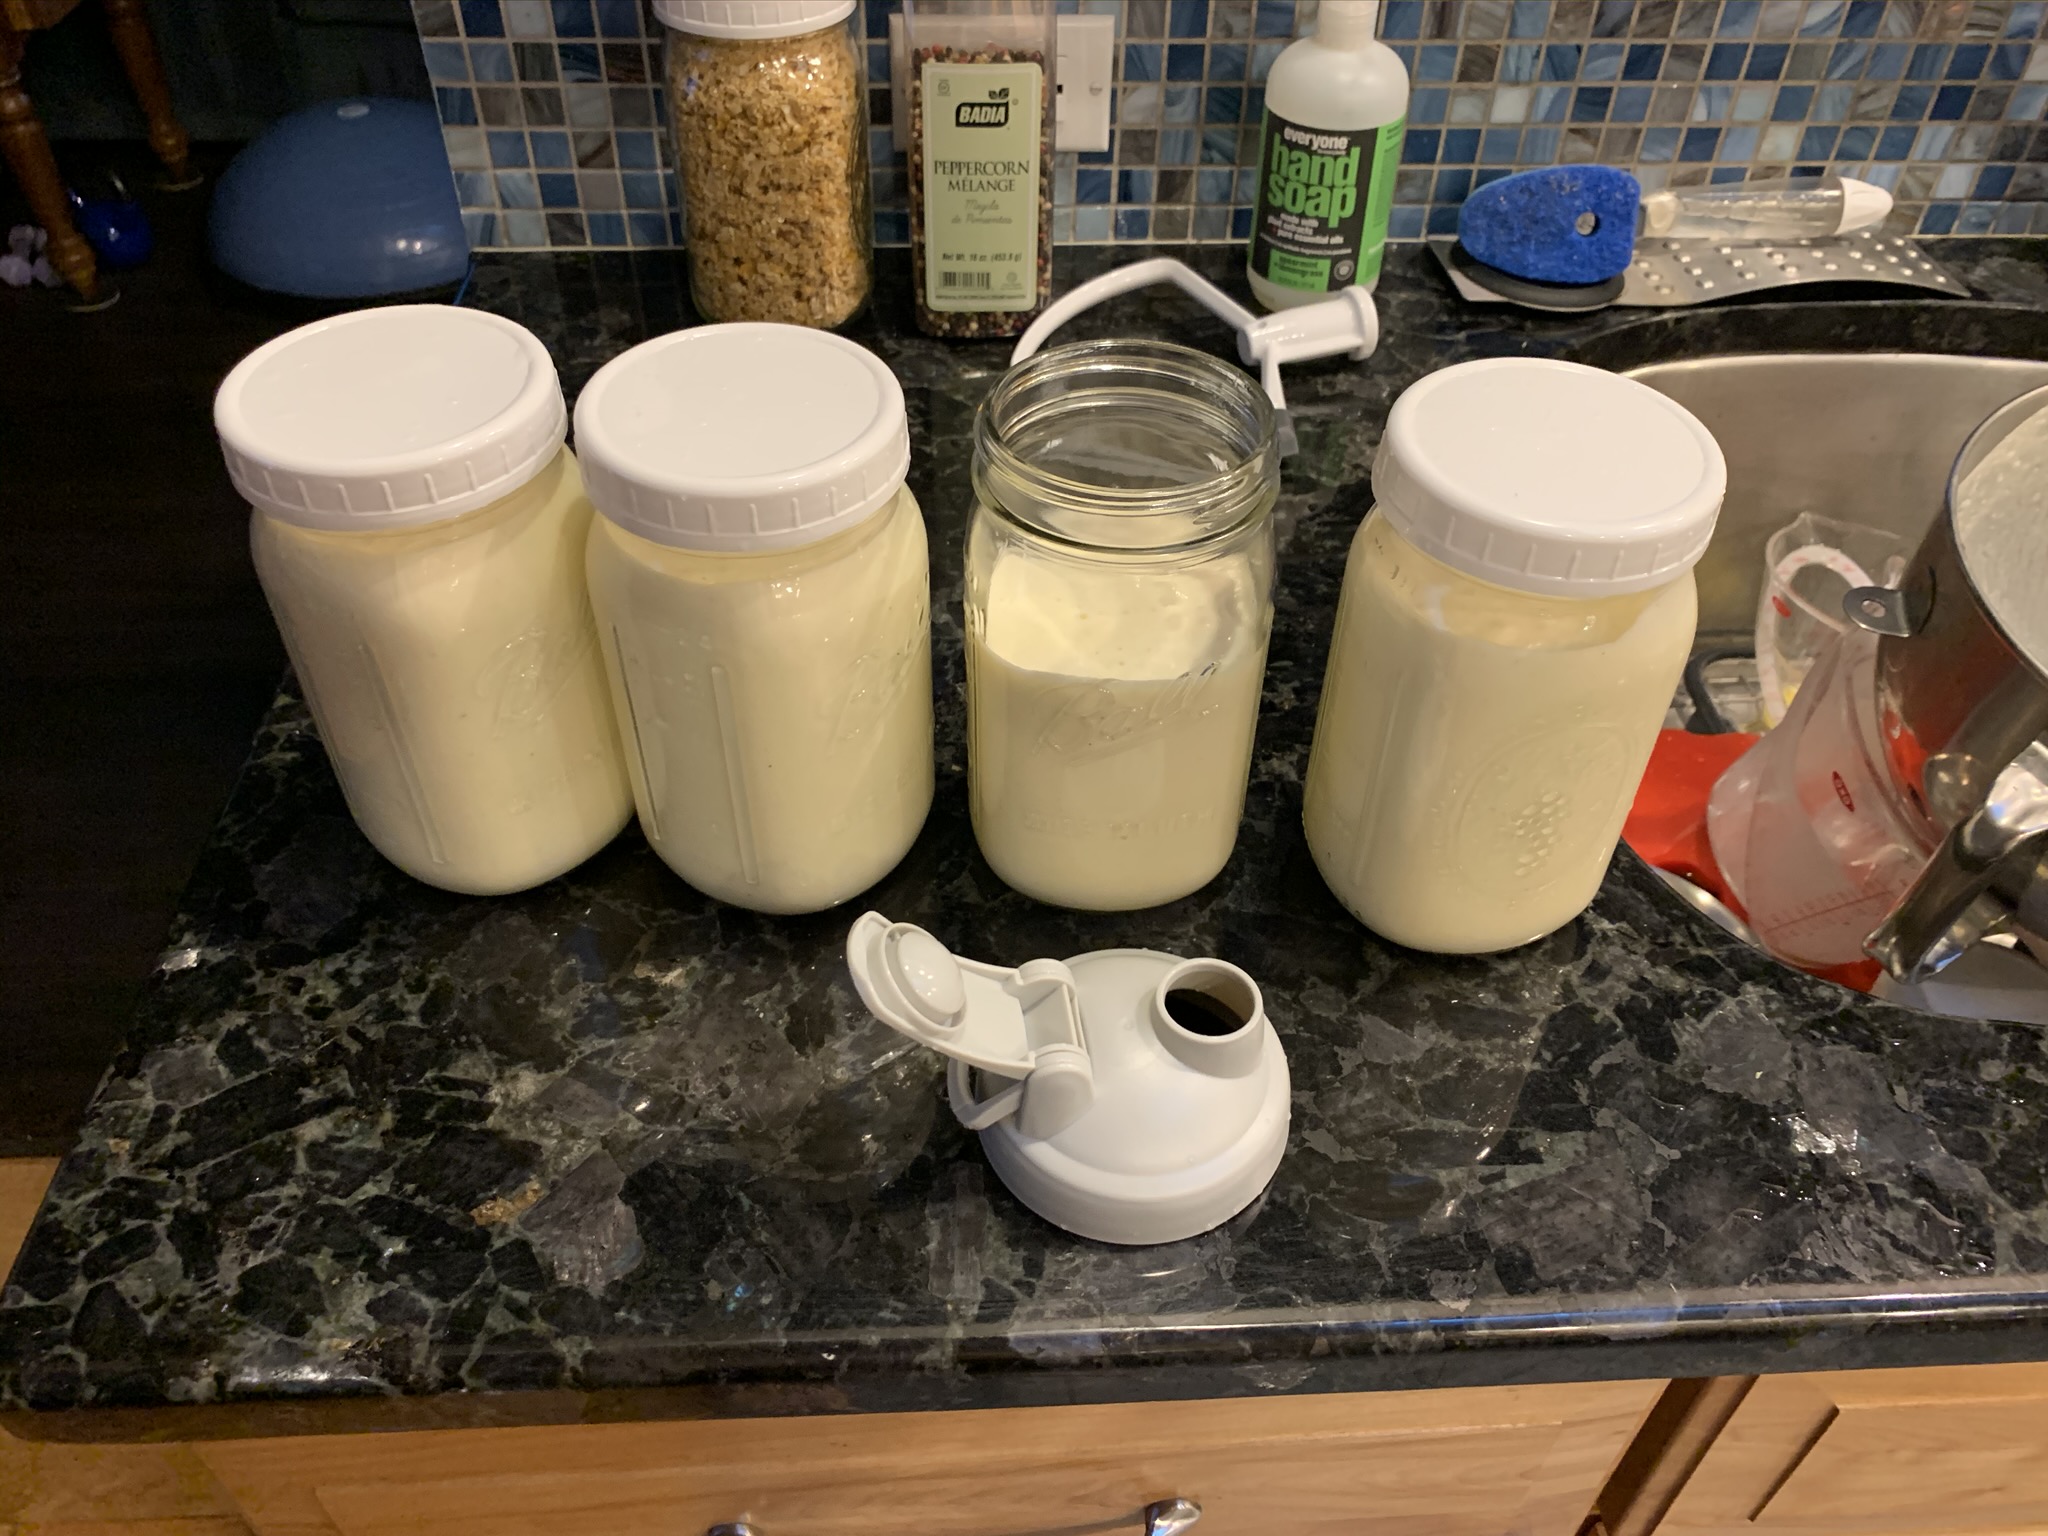
My solution is to pour it into quart mason jars for storage immediately after you mix the batch.  This gives you an easy way to store it in the fridge. Just give it a good shake to re-mix before serving. It’s even easier if you have pour lids on your mason jars.  Make sure you get the right size for your jars. Wide mouth jars makes it easier to fill without making a mess.

A full batch makes just under four quarts of eggnog. A half batch makes two. If you want to keep some “un-adulterated” nog, selectively mix the alcohol in after you’ve filled the mason jars. You can also use different alcohols based on your personal preferences. I like the way a bit of apricot brandy gives this a distinct flavor without being too overwhelming, but you can use the more traditional brandy and rum combo instead. One cup total of 80 proof alcohol in a full batch is “standard”.

Start with pre-chilled ingredients for the best result.  If you’ve only ever had store-bought eggnog you’re in for a treat.

Equipment:

Stand Mixer with whisk attachment
4x Quart mason jars with lids

Ingredients:

6 whole eggs (pasteurized carton eggs preferred)
2 1/2 cups heavy whipping cream
2 cups whole milk
1 cup granulated sugar
3/4 cup brandy
1/4 cup apricot brandy
1/2 teaspoon vanilla extract
1/2 teaspoon nutmeg, ground or grated

Substitute or remove alcohol as desired. ½ cup brandy and ½ dark rum is more traditional.

Steps:

In the stand mixer, beat the eggs together hard until they’re very frothy.

Add sugar and continue beating.

Sprinkle in nutmeg and vanilla, continue beating until well mixed.

While beating, add in the whipping cream a little at a time.

While beating, add in the milk a little at a time.

If you want alcohol in the entire batch, add it now.  While beating, of course.

Pour the eggnog into mason jars for storage.

If you held back the alcohol before, add it now.  Give each jar a vigorous shake to mix it all together.

Put the eggnog in the fridge to chill for 1 to 2 hours or overnight.  Serve cold.

Notes:

Many eggnog recipes call for caster sugar, which is sometimes available in the US as superfine sugar.  I use regular granulated sugar without issues, but if you can find superfine experiment for yourself. 

Since the eggs are pasteurized the eggnog will keep for several days in the fridge as long as you use fresh ingredients. (Un)fortunately I’ve never had a batch go un-consumed long enough for a formal test.


Prep Time – 20 minutes

Cook Time – 65 minutes

Makes two loaves

Ingredients

  • 4 cups (500g) all purpose flour (spoon and leveled)
  • 2 teaspoons baking soda
  • 1/2 teaspoon salt
  • 1 teaspoon ground cinnamon
  • 1 cup (2 sticks or 230g) unsalted butter, softened to room temperature
  • 1 1/2 cup (300g) packed light or dark brown sugar
  • 4 large eggs well mixed, at room temperature
  • 2/3 cup (160g) plain yogurt or sour cream (or Greek yogurt)
  • 2 cups mashed bananas (about 4 large ripe bananas)
  • 2 teaspoons pure vanilla extract
  • 1 cup strong coffee
  • Optional – 1 1/2 cups (200g) chipped pecans or walnuts or chocolate chips)

Instructions

Adjust the oven rack to the lower third position and preheat to 350 degrees.  Grease two 9×5 inch loaf pans or coat with non-stick spray.  Set aside.

Whisk the flour, baking soda, salt, and cinnamon together in a large bowl.

Using a stand mixer with the paddle blade, add the bananas and coffee.  Mix until mostly smooth, then use a spatula to transfer to a bowl.  It’s ok if there is a little residue left in the mixer.

In the stand mixer, beat the butter and brown sugar together on high speed until smooth and creamy, about 2 minutes.  Add the eggs one at a time.  Beat in the yogurt, mashed bananas, and vanilla extract on medium speed until combined.

With the mixer on low speed, slowly beat the dry ingredients into the wet ingredients until no flour pockets remain.  Do not overmix.  Fold in the nuts (or chocolate chips) if using.

Split the batter into the prepared pans and bake for 60-65 minutes.  Loosely cover the bread with aluminum foil after 30 minutes to help prevent the top and sides from getting too brown.  A toothpick inserted in the center of the loaf will come out clean when the bread is done.  Remove from the oven ad allow the bread to cool completely in the pan set on a wire rack

Cover and store banana bread at room temperature for 2 days or in the refrigerator for up to 1 week.  


Adapted from “Best Ever Banana Bread” and “Coffee-spiked Banana Bread”

Cooking time 4-5 hours on low


Ingredients:

2 cups chipped onions

1 cup oil-packed sun dried tomatoes, rinsed and chopped

2 tablespoons minced garlic

1 tablespoon olive oil

2 teaspoons herbes de Provence

4 cups chicken broth

1 14oz can chickpeas, rinsed

3 tablespoons instant tapoica

4 pounds boneless skinless chicken thighs, trimmed

Salt and pepper

1 cup pitted kalamata olives, halved

1/4 cup minced fresh parsley or basil


Directions:

  1. Microwave onions, tomatoes, garlic, oil, and herbes de Provence in a bowl, stirring occasionally, until the onions are softened, about 5 minutes, transfer to slow cooker.
  2. Stir in broth, chickpeas, and tapioca.
  3. Season chicken with salt and pepper and nestle into slow cooker.  Cover and cook until chicken is tender, 4 to 5 hours on low.
  4. Using a large spoon, skim excess fat from surface of stew.  Break chicken into about 1″ pieces with tongs, or remove and shred.
  5. Stir in olives and let sit until heated through, about 2 minutes.  Adjust stew consistency with extra hot broth as needed.
  6. Stir in parsley and season with salt and pepper to taste.  Serve.


Note: I used two large boneless chicken breasts (probably around 1 1/2 pounds) and two cans of chickpeas instead of the book recipes.  Also I didn’t have fresh basil so I added 3 large spoonfuls of basil pesto to the stew at the end instead.  If you don’t have herbs de Provence you can make up a replacement with common herbs.  Google the mixture and get as close as you can with what you have.

In the microwave step I put all the items in a bowl and microwave covered for 2 minutes, 1:30, 1:30, stirring between each stop.  2 medium onions is roughly 2 cups when diced.

Total Time: 1 hour

Ingredients

1 pound sweet or hot Italian sausage (I prefer hot)

2 x 15 oz cans cannellini beans, rinsed

1 x 28 oz can diced tomatoes, drained with juice reserved

1 cup chicken broth

2 tablespoons extra virgin olive oil

1 onion, chopped fine

3 garlic cloves, minced

1 pound kale, stemmed and chopped (I generally use less because the pot fills up)

Salt and Pepper

Directions

  1. Puree 1/2 cup beans, 1/2 cup tomatoes, reserved tomato juice, and chicken broth until smooth
  2. Heat oil in Dutch oven over medium heat until shimmering.  Add sausages and brown on all sides, about 5 minutes.  Transfer to plate.
  3. Add onion to fat/oil left in pot and cook until softened, about 5 minutes.  Stir in garlic and cook until fragrant, about 30 seconds. 
  4. Stir in pureed bean mixture, kale, remaining tomatoes, and 1/4 teaspoon salt, scraping up any browned bits, and bring to simmer.  Reduce heat to medium low, cover and cook, stirring occasionally, until kale is wilted and tender, about 15 minutes.
  5. Stir in remaining beans, then nestle sausages into pot, adding any accumulated juices.  Cover and cook until sausages register 160 degrees and sauce is thickened slightly, about 10 minutes.  Season with salt and pepper to taste and serve.

Serve with crusty bread.


Stolen from “Cook it in your Dutch oven, page 41, by America’s Test Kitchen


Serves 4

  • Total Time 1 hour

Ingredients

2 pounds boneless skinless chicken breasts, trimmed and cut into 1-inch pieces.

3 tablespoons unsalted butter

2 leeks, white and light green parts only, halved lengthwise, sliced thin, and washed thoroughly

1 1/2 cups pearl couscous

3 cups chicken broth

2 cups (2oz) baby spinach, chopped coarse

3/4 cup Parmesan cheese, grated (1 1/2 oz)

1/2 cup frozen peas

1/3 cup heavy cream

Directions

  1. Season chicken with salt and pepper.  Melt 1 tablespoon butter in Dutch oven over medium-high heat.  Brown chicken on all sides, about 6 minutes; Transfer to bowl.
  2. Melt the remaining 2 tablespoons butter in now-empty pot over medium heat.  Add leeks and couscous and cook until leeks have softened and couscous is lightly toasted, 4 to 6 minutes.  Stir in broth and 1 teaspoon salt, and bring to simmer.  Reduce heat to medium-low, cover, and cook, stirring occasionally until couscous is tender, about 12 minutes.
  3. Stir in chicken and any accumulated juices and cook, covered, until chicken is cooked through, about 5 minutes.  
  4. Off heat, stir in spinach, Parmesan, peas, and cream and let sit until heated through, about 5 minutes.  Serve.

Note: Pearl couscous is often labeled “Israeli couscous” in the supermarket.  Do not substitute regular couscous, as it requires a different cooking method and will not work here.

Note: To clean leeks:

  • lay trimmed, halved leeks cut side down on a cutting board and cut to desired size. 
  • Transfer leeks to a bowl of cold water and rub together until layers separate.  Set aside for 1 minute to allow grit to settle to bottom of bowl. 
  • Lift leeks from water and transfer to colander to drain.  Do not pour leeks from bowl into colander, or you’ll pour dirt over them again.


Stolen from: “Cook it in your dutch oven”, page 21, by America’s Test Kitchen

Serves 4

  • Total Time 1 hour 30 minutes

Ingredients

3 tablespoons unsalted butter

2 tablespoons curry powder

2 onions, chopped

1 jalapeno chili, stemmed, seeded and minced (or 1 can green chilies)

Salt and pepper

3 garlic cloves, minced

1 tablespoon grated fresh ginger

2 chicken breasts, boneless and skinless

1 1/2 cups water

8 ounces yukon gold potatoes (or substitute other kinds), peeled and cut into 1/2-inch pieces

1/2 head cauliflower (1 pound), cored and cut into 1 inch florets

1 cup frozen peas

3/4 cup plain whole-milk yogurt

1/4 cup minced fresh cilantro

Directions

  1. Melt butter in Dutch oven over medium heat.  Add curry powder and cook until fragrant, about 10 seconds.  Stir in onions, chilies, 1/14 teaspoons salt, and 1/4 teaspoon pepper and cook until vegetables are softened, about 5 minutes.  Stir in garlic and ginger and cook until fragrant, about 30 seconds.
  2. Add chicken and water to pot and bring to simmer.  Reduce heat to low, cover, and cook until chicken registers 160 degrees, 22 to 24 minutes, flipping chicken halfway through cooking.  Remove chicken and shred.
  3. Meanwhile, stir potatoes and 1/4 teaspoon salt into curry, cover, and cook over low head until potatoes are slightly tender, about 8 minutes.  Stir in cauliflower and cook, covered, until potatoes are fully cooked and cauliflower is tender, about 15 minutes, stirring occasionally.
  4. Stir in chicken and peas
  5.  and cook until heated through, about 1 minute.  Remove from heat.
  6. Off heat, stir in yogurt and cilantro.  Season with salt and pepper to taste.  Serve over rice.

Do not substitute low-fat or non-fat yogurt for the whole milk yogurt, or the dish will be much less creamy.

Stolen from: “Cook it in your dutch oven”, page 23, by America’s Test Kitchen

Serves 6

  •         Hands-On Time 60 min
  •         Total Time 48+ hours

Ingredients

4 pounds corned beef (I use the pre-brined store brisket with the spice packet)
6 slices of bacon, cut into ½ inch strips
1 head of cabbage, cut into 1-inch strips
2 cups chicken stock
1/2 cup champagne vinegar

Directions

  1. Remove the corned beef from the store bag.  Pour out the liquids and place the beef in a cooking pouch.  Add the spices from the spice pack to the cooking pouch and vacuum seal.
  2. Cook the beef sous vide for 48+ hours at 134 degrees.  
  3. About 45 minutes before you are ready to serve the meal, prepare the cabbage.
  4. In a skillet, over medium heat, cook the bacon pieces until they are crisp and the fat is rendered. Pour off all but 1-2 tablespoons of the bacon fat.
  5. Add the cabbage strips to the skillet, raise the heat to medium-high, and cook for about 5 minutes.
  6. Add the chicken stock and the vinegar to the pan and continue to cook the cabbage in the liquid until tender.
  7. When the cabbage is almost tender, remove the corned beef from the water bath and the cooking pouch.
  8. To serve, slice the corned beef into 1/2″ – 3/4″ slices and serve atop the cabbage.

Note: 140 degrees is more “medium” and still good.  I’ve also done 137 degrees and 72 hours.


Stolen from : blog.sousvidesupreme.com/2011/03/sousvide-corned-beef-and-cabbage

Serves 6

  •         Hands-On Time 30 min
  •         Total Time 1 hr 30 min

Ingredients

2 lbs Chicken Thighs or Breasts, boneless / skinless

4 stalks celery, chopped

4 carrots, chopped

2 onions, chopped

3/4 cup buttermilk

2 tablespoons fresh thyme leaves or 2 teaspoons dried thyme

2 tablespoons chopped fresh flat-leaf parsley leaves, plus more for serving

2 bay leaves

2 cloves garlic, chopped

2 1/2 cups all-purpose flour

1 tablespoon baking powder

1/2 teaspoon baking soda

6 tablespoons (3/4 stick) unsalted butter, melted

1 tablespoon olive oil

Salt and pepper

10 cups water


Directions

 1 Heat the oil in a large pot or Dutch oven over medium-high heat. Season the chicken with ½ teaspoon each salt and pepper. Brown in batches, 4 to 6 minutes per side. Transfer to a plate; reserve the pot.

 2 Add the celery, carrots, onions, thyme, and garlic to the drippings in the pot and cook, stirring, until the vegetables begin to soften, 5 to 7 minutes. Add the chicken, bay leaves, and 10 cups water. Bring to a simmer and cook until the chicken is cooked through, 25 to 30 minutes. Discard the bay leaves and transfer the chicken to a plate; let cool. Shred the chicken  and return it to the pot.

 3 Whisk together ½ cup of the flour, 2 cups of the cooking liquid, and ¼ teaspoon each salt and pepper in a small bowl. Slowly whisk the flour mixture back into the pot and simmer until slightly thickened, 8 to 10 minutes.

 4 Make the dumplings: Whisk together the remaining 2 cups of flour, the baking powder, baking soda, and ¼ teaspoon each salt and pepper in a medium bowl. Whisk in the butter, buttermilk, and parsley. Reduce heat to low and drop the mixture into the broth in 8 large spoonfuls. Simmer, covered, until the dumplings are firm, 12 to 15 minutes. Serve sprinkled with parsley.